Create & Manage Rooms
💻 Configure > Rooms
Overview
💡 At least 1 room is required for your centre/service configuration!
Even if your Centre has no 'physical' rooms we need to identify the placement of children at the service. Rooms can be created and disabled (e.g. for School Holiday Programs or vacation care) where they are only needed at certain times of the year.
Creating a new room
- Go to 💻Configure > Rooms
- Enter the room name in the Add Room section
- Enter other fields as required (Optional)
- Click Add Room
| Fields | Description |
|---|---|
| Room Name (Required) | Identified the room in the portal and app |
| Max. Capacity per day | Used for reporting & limiting casual bookings |
| Override ACECQA Child/Carer Ratio | Allows you to specify your own ratio for the room, regardless of ages, which may be lower or higher [NOT RECOMMENDED] |
| Profile Image | Not currently displayed - future proof feature |
| Exclude Staff (in Room) for Ratio | Staff checked into this Room won't be counted towards Ratio |
| Staff Only Room | Children cannot be booked into this Room. It is for staff to check into only |
Editing a Room
⚠️ Once you create a room, the room name is locked and cannot be changed!
Upon request, OWNA can edit room names on a case-by-case basis, subject to approval.
Please note:
Any reports or data generated before the name change will reflect the new room name.
You will not be able to report on the previous room name after this change is completed.
Consider the implications for your data reporting before requesting a name change.
Room Details Tab
This tab is used to update general room details and configurations.
- Room Age (general range of children who should be in this room
- Max. Capacity per day (used for reporting, casual bookings, and rostering)
- Override ACECQA Child/Carer Ratio (only to be used if you don't use the default ratios for your state)
- Profile image (future-proofing feature)
- Exclude Staff (checked into this room) for Ratio
- Disable this Room
- Staff Only Room
Fees Matrix Setup Tab
This tab is used to add and update room fees. You will need special permission to access this section.
➜ Adding / Updating Room Fees (Fees Matrix)
Room Capacity Tab
This allows you to enter a room capacity for specific dates lower than the 'Max. Capacity per day' setting in the Room Details tab. This allows you to plan ahead and restrict the number of auto spots added for casual bookings.
- If no dates have been entered, the system will use the 'Max. Capacity per day' value in the Room Details tab!
- Casual Booking spots are only automatically updated daily after 6:00 PM (Sydney Time)
- Users require Admin + Can Manage Fees Matrix to set and delete Room Capacity
Steps:
- Select Date Range (Weekends will be Excluded) OR Select Multiple Dates
- Enter the Max Capacity (per day for the selected range)
- Enter a Reason (optional)
- Click Update Capacity
Edit/Delete:
If you need to change the capacity for any dates, repeat the above steps to overwrite the existing entry with a new value or use the delete button to remove individual lines.
Room Discount
- Users require Admin + Can Manage Fees Matrix to set and delete Room Capacity
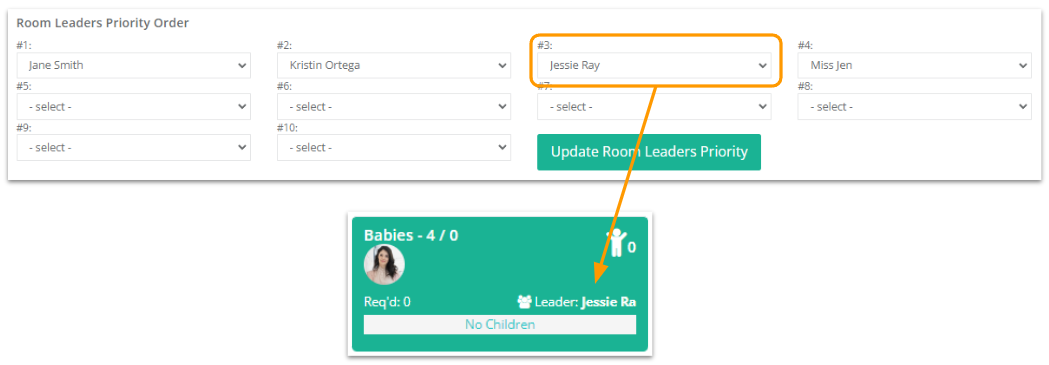
Room Leader Priority Tab
The Room Leader Priority allows you to set up a hierarchy of users to display as the room leader (on the dashboard) when they are logged into the room.
A higher rank (lower number) will take over the Room Leader position when signing into a room.
Block Out Dates
This feature allows an Admin to add 'block out' dates that will remove existing attendances and prevent new attendances from being generated/booked in the room.
Children
This tab allows you to track the age of each child currently booked into the room and makes suggestions for when they need to transition to another room (based on the Room Age configured in the Room Details tab).
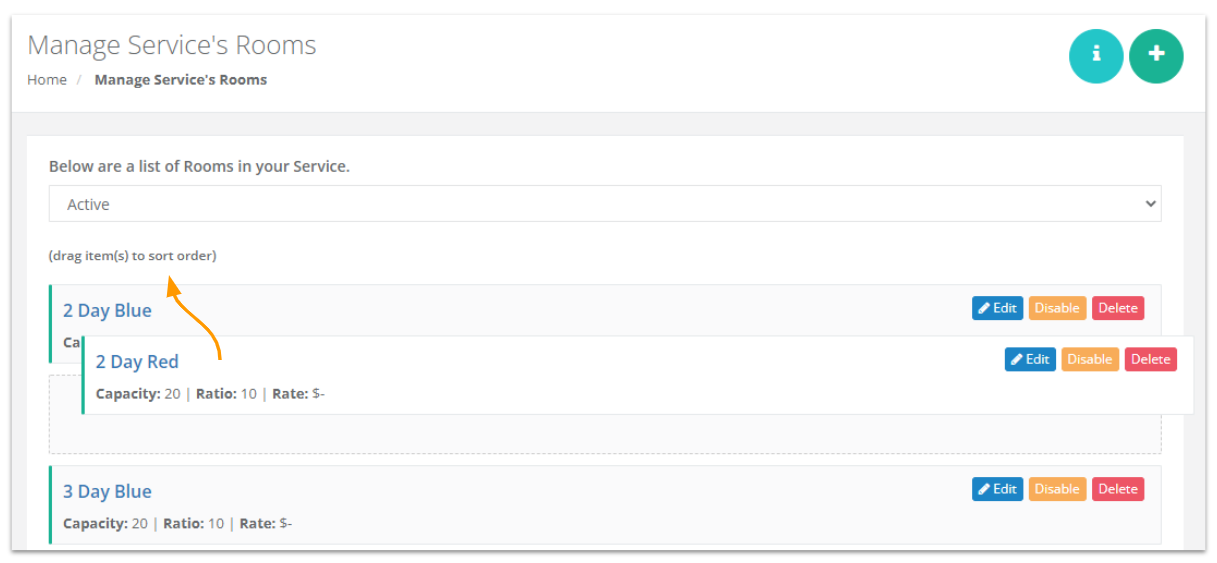
Changing the Room Order
From the Manage Rooms screen, you can click and drag a room up or down the list to change the order they appear in lists, on the dashboards, roster and app.
Roster Only Rooms
Rooms can also be added so that staff can be rostered in. Sometimes, these rooms/locations may only be for staff and not count towards the educator-to-child ratios.
If this is the case, edit the room again after creating it to tick the following options:
- Exclude Staff (checked into this Room) for Ratio
- Staff Only Room
Default Room Check-in Locations
- Programming
- Break
- Break - Out of Service
- Admin
- Kitchen Duties/Meal Preparation
- Cleaning Duties
- Study
- Work from Home
- Away from Service
Deleting and Disabling Rooms
Deleting a Room is not recommended! This should only be used in the event you created one in error and need to remove it. You must ensure there are no children within the room before doing so.
If you want to temporarily deactivate or hide a room for a period of time, you can Disable the room. These can then be enabled again by changing the Room Status filter at the top of the list.